Beszel - The Simple Way to Self-Host lightweight Server Monitoring
What is Beszel
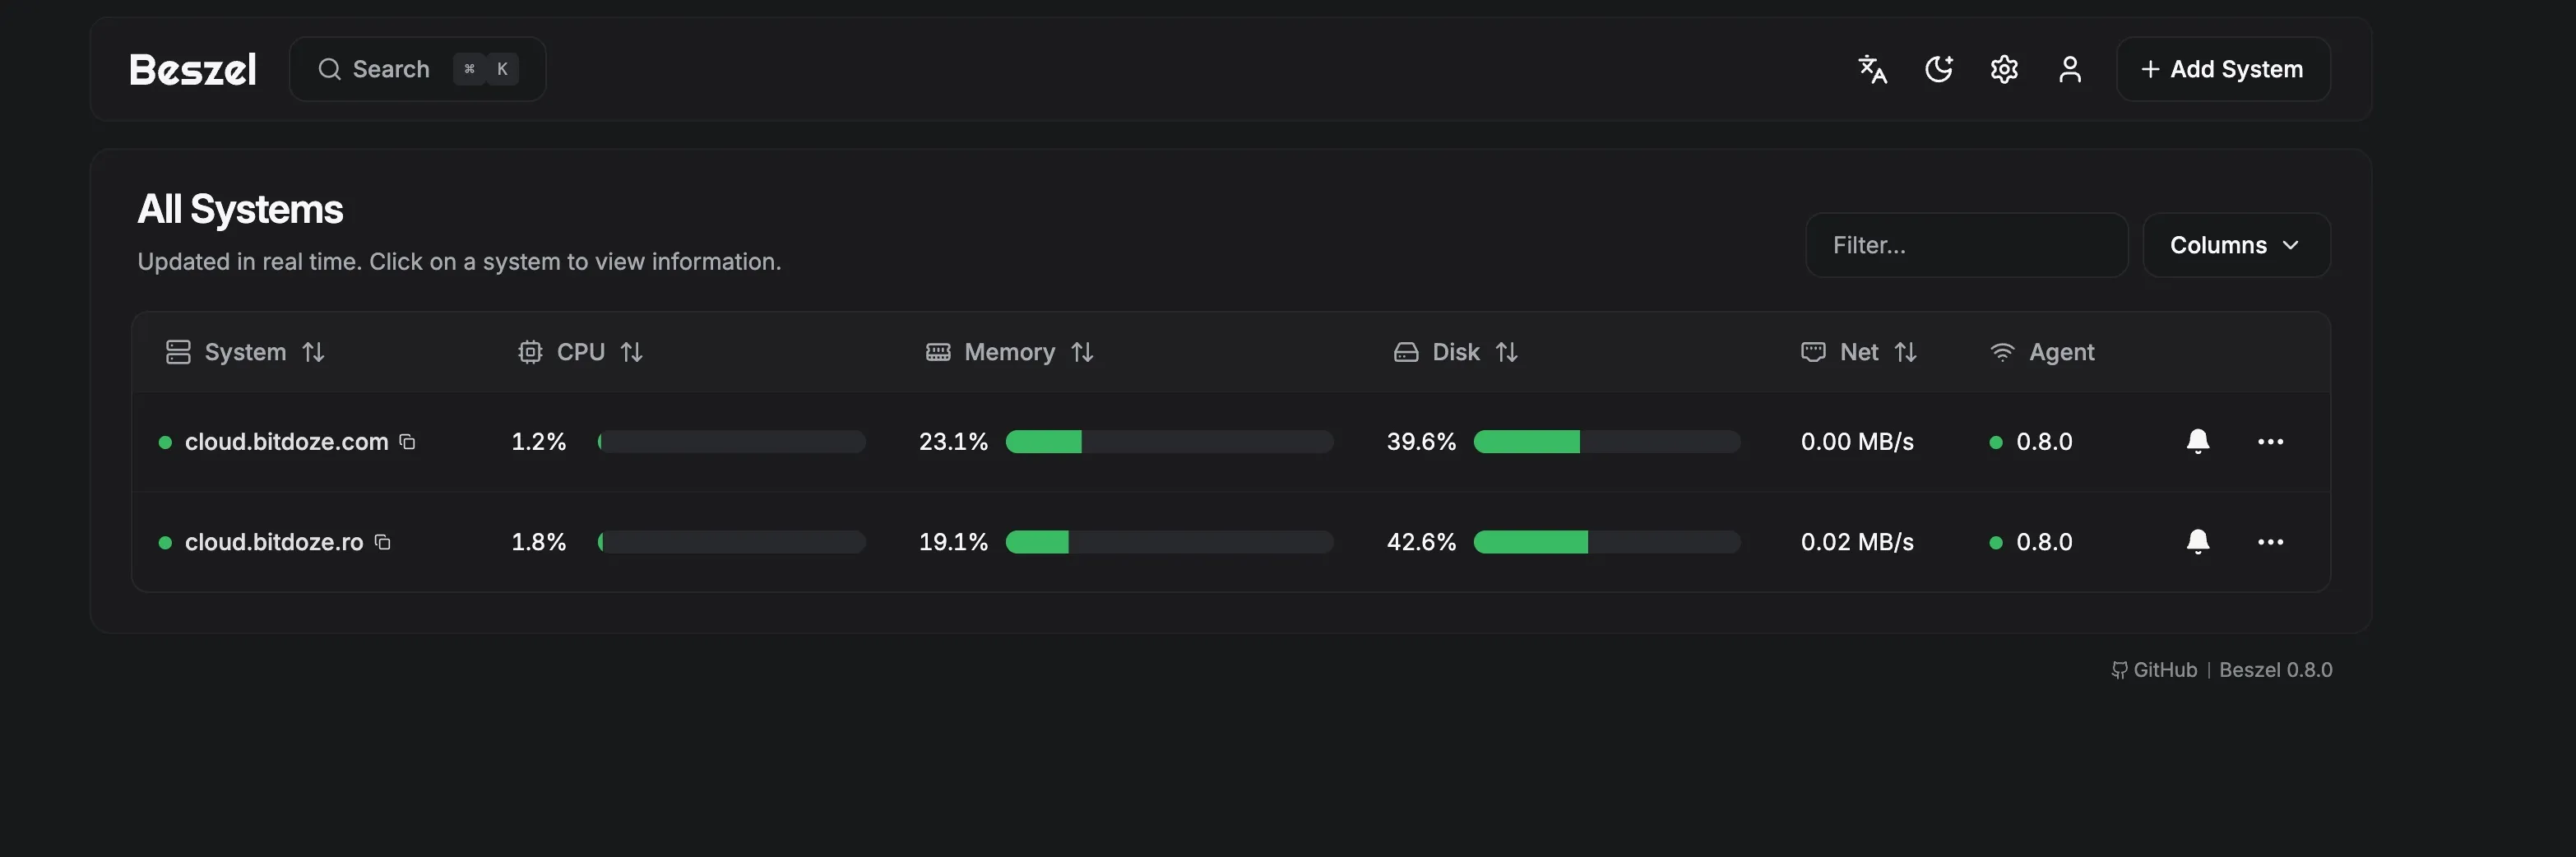
- Beszel is a simple, self-hosted server monitoring tool.
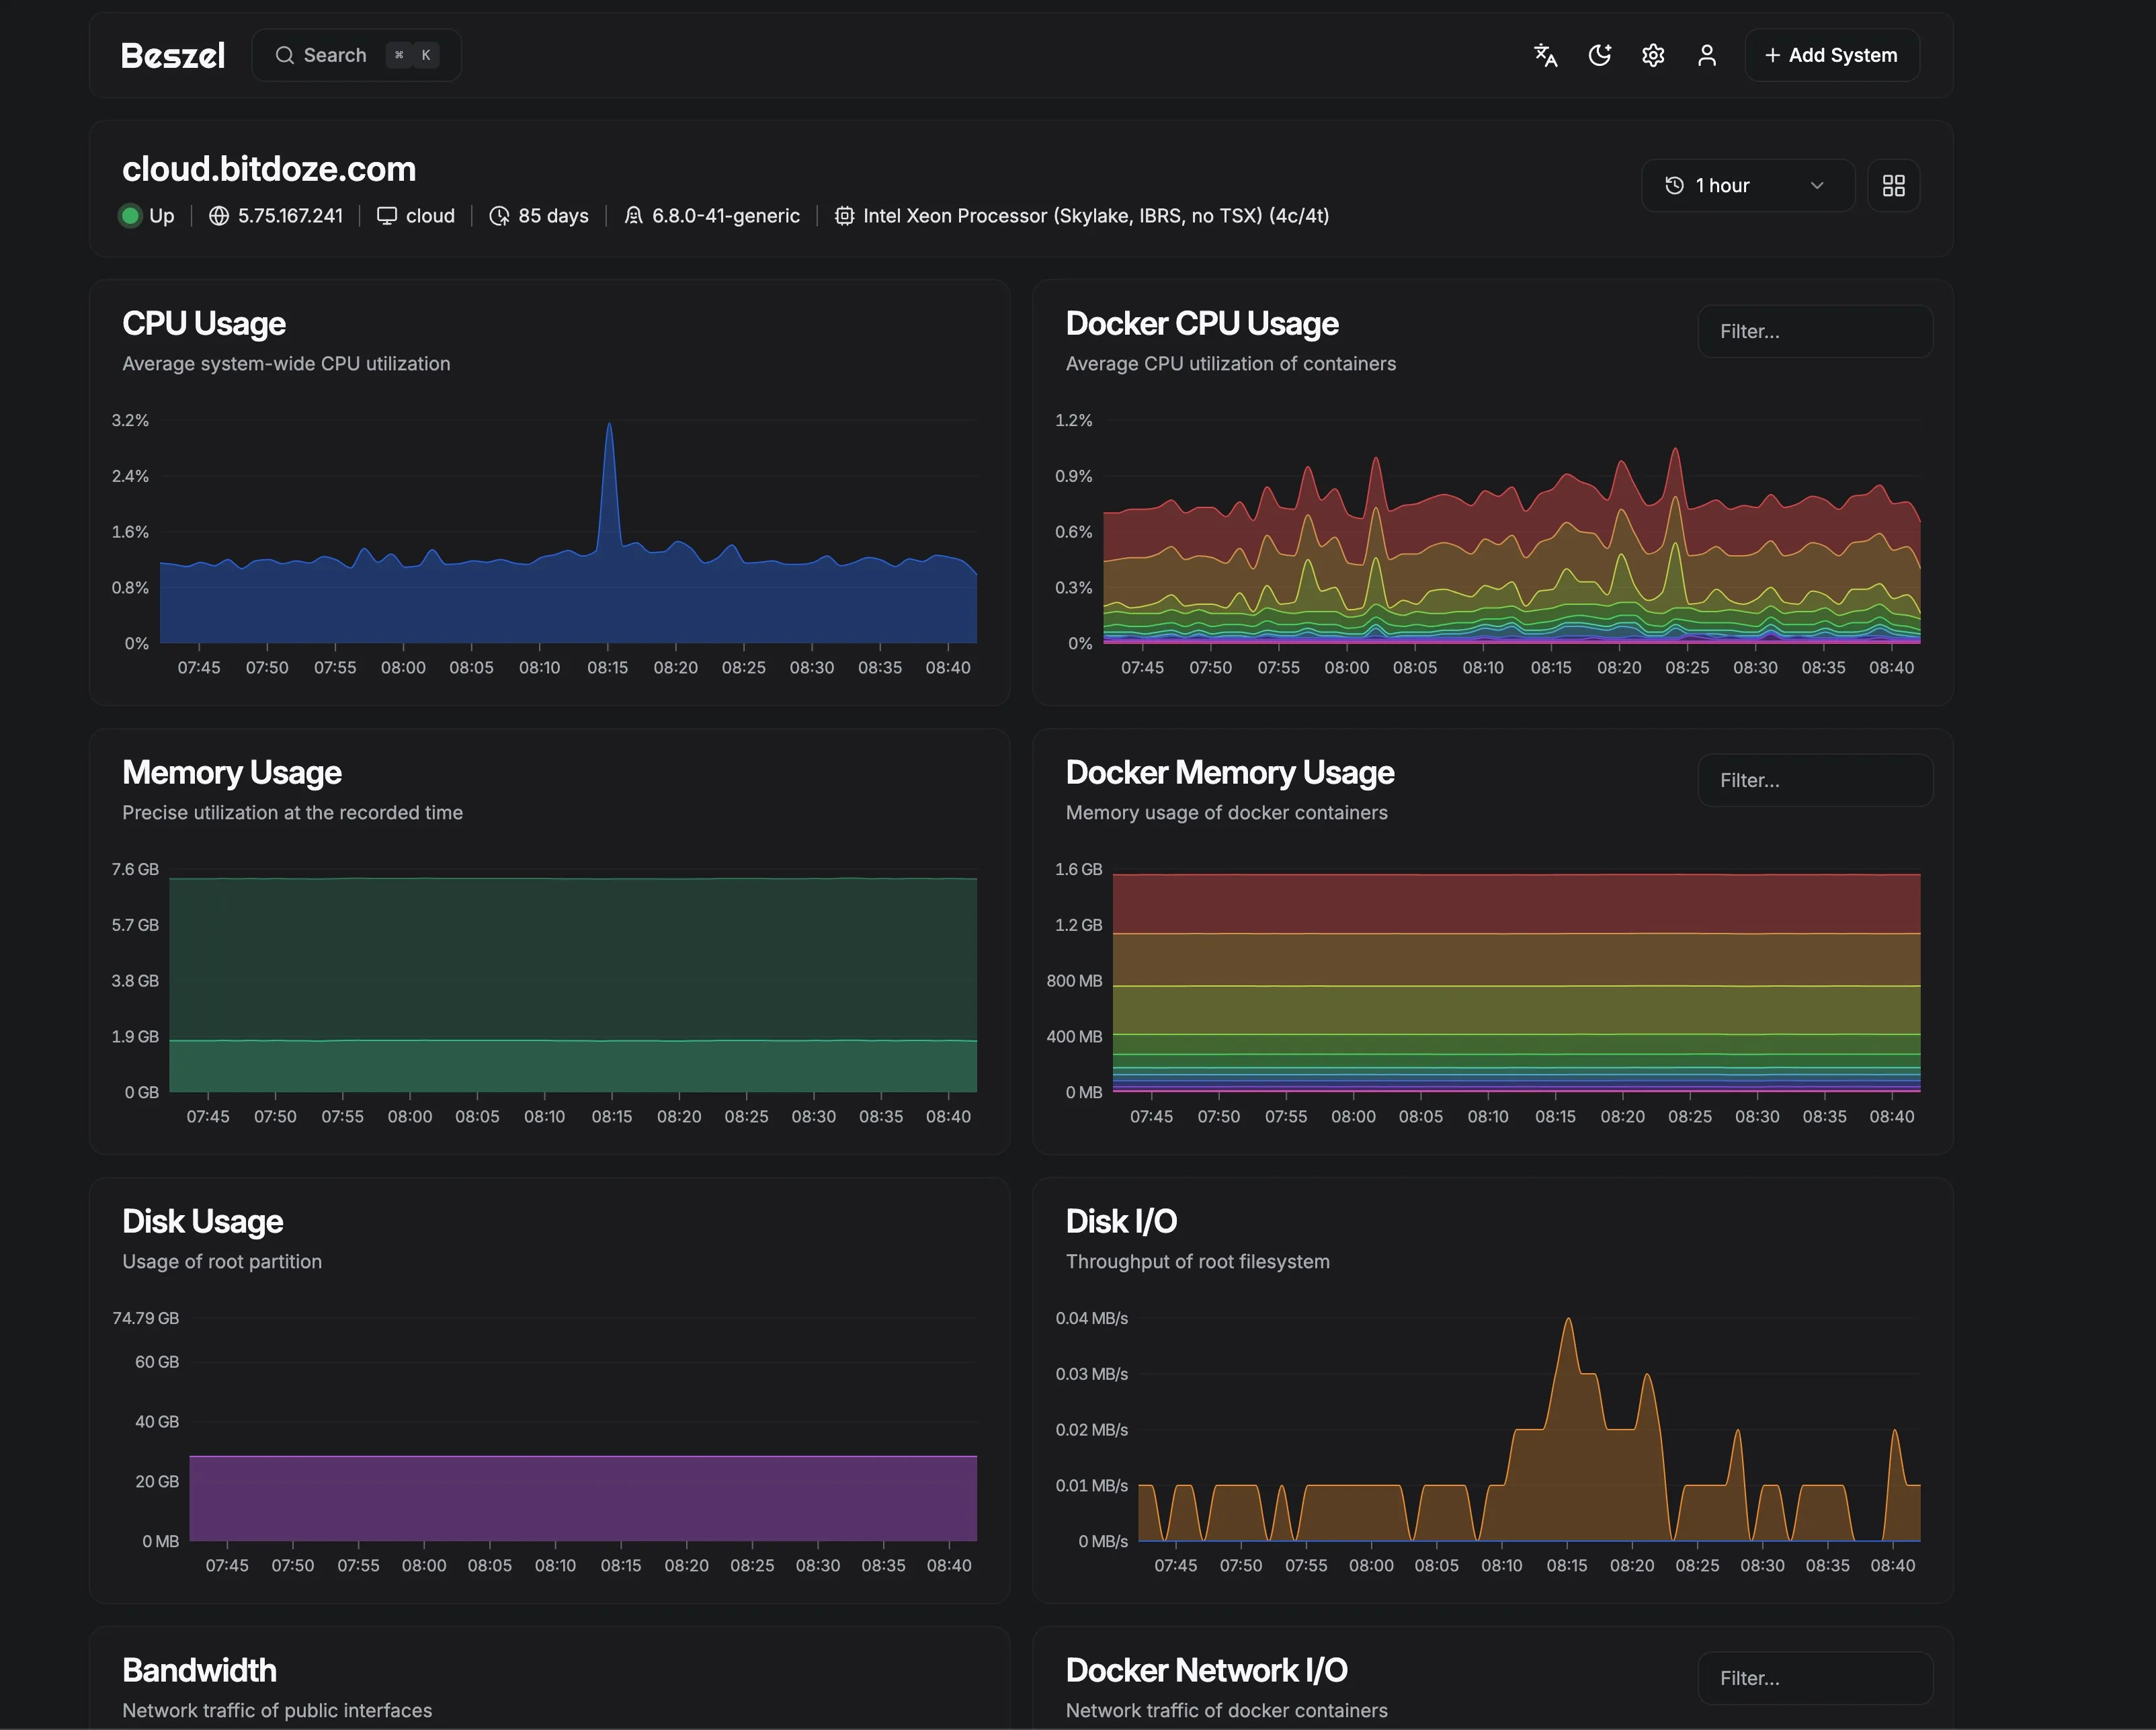
- It shows real-time CPU, memory, and disk usage across your machines.
- Designed for clarity — no clutter, just essential stats.
- Easily deploy it with Docker Compose in seconds.
- Perfect for homelabs and small teams who want simple server insights.
- Self-host App-Insights alternative for your Homelab
Beszel
 And get more details:
1. Webpages
https://beszel.dev/guide/getting-started
https://github.com/henrygd/beszel
2. Installation
mkdir /opt/stacks/beszel

cd /opt/stacks/beszel/

nano compose.yaml
Put this in the file:
services:
  beszel:
    image: henrygd/beszel:latest
    container_name: beszel
    restart: unless-stopped
    ports:
      - 8090:8090
    volumes:
      - ./beszel_data:/beszel_data
      - ./beszel_socket:/beszel_socket

  beszel-agent:
    image: henrygd/beszel-agent:latest
    container_name: beszel-agent
    restart: unless-stopped
    network_mode: host
    volumes:
      - ./beszel_socket:/beszel_socket
      - /var/run/docker.sock:/var/run/docker.sock:ro
    environment:
      LISTEN: /beszel_socket/beszel.sock
      # Do not remove quotes around the key
      KEY: 'UPDATE WITH YOUR PUBLIC KEY (copy from "Add system" dialog)'
We will now use our servers key : KEY:‘ssh-ed25519 AAAAC3NzaC1lZDI1NTE5AAAAIKrUm3Wo0ZctSuxWDhVpES3inTvsTZvRsB/r/B0OGnS+’
Run this command:
docker compose up -d
3. Open in Browser
http://localhost:8090 or your chosen address. \ http://your-server-ip:8090/
http://tiger.loseyourip.com:8090/
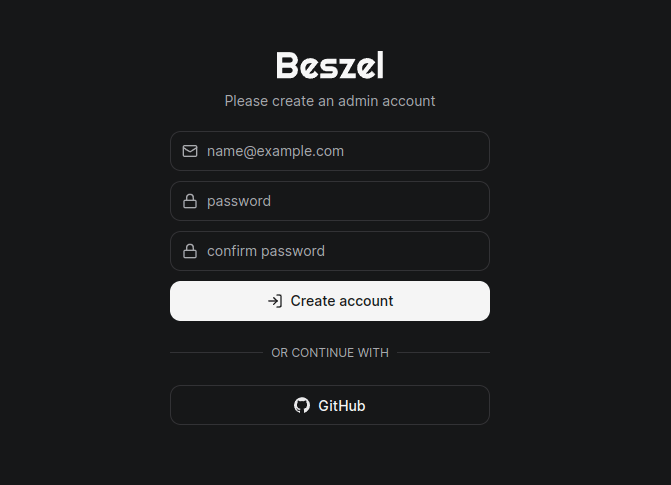
4. Create an admin user
After starting the hub, navigate to:
http://localhost:8090 or your chosen address.
We will use:
http://tiger.loseyourip.com:8090/
You will be prompted to create an account:
5. Configure your first system
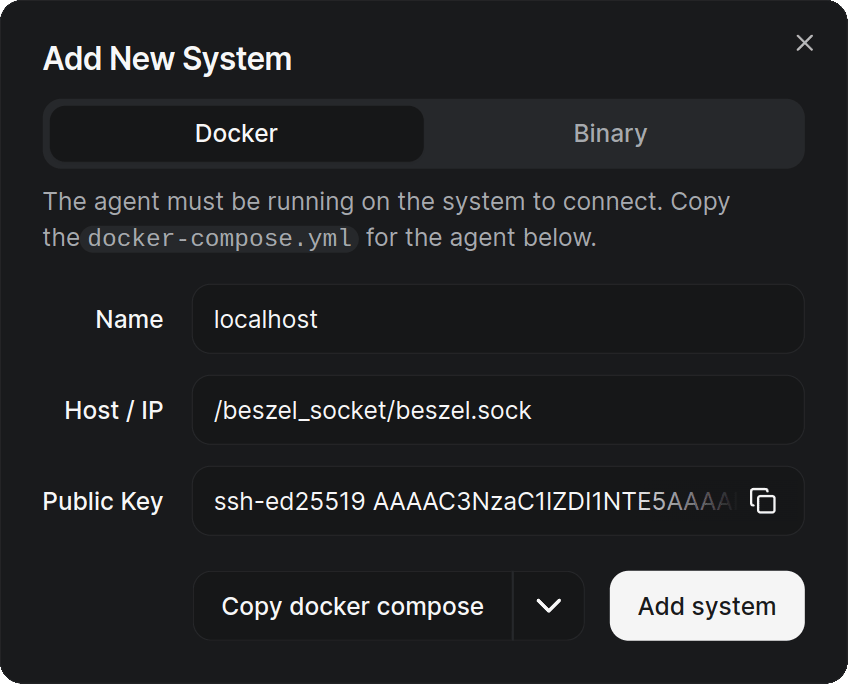
Click the Add System button in the top right corner to open the system creation dialog.
We’re using a local unix socket in this example, but you can use a remote agent instead.
Do not click the Add System button inside the dialog until you’ve started up the agent.
5.1 Start the agent (For Docker installation)
Copy the docker-compose.yml content from the Add System dialog.
Create a directory somewhere to store the agent’s docker-compose.yml file.
mkdir /opt/beszel-agent
cd opt/beszel-agent
Create a docker-compose.yml file and paste in the content provided in the Add System dialog.
nano docker-compose.yml

# Copy the yaml content frm the dialog

# Start the Agent
docker compose up -d
5.1.1 Finish adding the system
Now that the agent is running, click the Add System button in the dialog.
You will see the new system in table. If it flips to green, you’re good to go.

If it changes to red, check the Common Issues page.
5.2 For servers you want to install Agent not running Docker
Copy the Linux bash command
mkdir /opt/beszel-agent
cd opt/beszel-agent

nano install.sh
Put this in the file
#!/bin/bash
# Paste the linux bash command here:
Run these commands
chmod 775 install.sh

./install.sh
Go back to the browser and click the AddSystem button